There are many benefits of VPS hosting versus Shared Hosting. For Example if you host your website off a VPS you will have dedicated resources available for your server. You no longer have the “bad neighbor” effect you can experience with shared hosting.
Additionally most reliable VPS Providers host their VPS’s on high powered dedicated hardware that is highly redundant. So your VPS will be available 99.95% of the time for most decent hosts. Keep in mind a VPS is a server and does require maintenance just like a physical server. That accounts for the .05%. If someone says they guarantee 100% uptime they are not being completely honest. You will need to reboot at some point to install certain security patches or new kernel. You can get around outages by load balancing but we will save that for another post.
Setting up a Virtual Private Server aka VPS is easier than you may think. You can choose any hosting provider you like but for this example we will use a good Xen VPS provider we use called ZoomCloud.net. They specialize in Xen VPS Hosting.
When looking for a good VPS provider we prefer ones that use Xen Hypervisor vs. other technologies like OpenVZ, KVM etc. Mainly because its harder to over subscribe physical resources of the host. This means your resources are for the most part dedicated. If you have a VPS with 4 GB of ram that 4 GB will be available to your server no matter what.
OK So now that you know why its a good reason to host from aVPS lets show you how easy it is to set one up.
First thing you will want to do is browse to zoomcloud.net and choose the model VPS you want. We recommend their Pro or Ultimate VPS models.
- ZoomCloud.net’s VPS Models
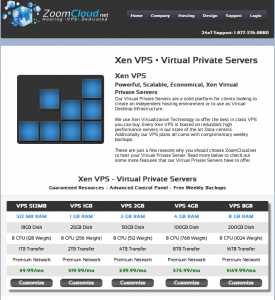
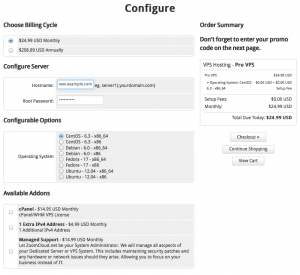
For this example we will choose the Pro VPS. After selecting this model we are taken to the configuration page. Here you choose your billing cycle (Monthly/Yearly), configure the VPS’s hostname and root password. You can also choose to purchase additional options such as additional IP addresses or license the cPanel/WHM Control panel.
Once you click checkout you will be taken to a screen where you can enter your Name and Address information, and choose your payment gateway. Make sure you enter an email address you can access as you will need to reference a mail you get sent in the next step.
When you click submit you will be redirected to PayPal’s (or other payment gateways) website to complete your transaction securely. Added plus is PayPal accepts all major credit cards and keeps your info safe.
After you pay your VPS will be deployed, this usually takes a couple of minutes to process, but you will get an email.
In this Email will be all the information you need to access your VPS such as IP address, Password, support contact information etc:

And there you have it. Your now the proud owner of a new VPS. This is all great but now what? Be Sure to check out our next post on Securely Accessing Your VPS.
Leave a Reply